Archive
Implement MySQL Replication in 3 simple steps
For a project we need a second MySQL database for reporting, so whe can split the day to day business (forms) and the analytic reporting. Another thing is that the data must be very actual, so a nightly backup is not really an option.
Use the following steps to implement MySQL Replication:
1) Configure master and slave instances
2) Create Replication user on the master
3) Connect from the slave to the master
Step 1) Configure master- and slave instances
Every server need a unique server ID. We use for the master server-id=1 and for the slave server-id=2.
Binary logging must be enabled (log-bin=mysql-bin) on the master because the binary log is the basis for sending data changes from the master to its slaves. If binary logging is not enabled, replication will not be possible.
For the greatest possible durability and consistency in a replication setup using InnoDB with transactions, you should use innodb_flush_log_at_trx_commit=1 and sync_binlog=1.
Find the MySQL configuration files (on Ubuntu it is located in /etc/mysql/my.cnf). Add the following lines in both the master- and slave configuration files.
[mysqld]
server-id=1
log-bin=mysql-bin
innodb_flush_log_at_trx_commit=1
sync_binlog=1
[mysqld]
server-id=2
log-bin=mysql-bin
innodb_flush_log_at_trx_commit=1
sync_binlog=1
Restart the master- and slave instances.
/etc/init.d/mysql restart
Step 2) Create Replication user on the master
Now we need to create a Replication user on the master that is used for the connection from the slave.
Logon on you’re master with the root user:
mysql -u root -p
and type in the MySQL prompt:
mysql> GRANT REPLICATION SLAVE ON *.* TO 'repl'@'%' IDENTIFIED BY 'repl';
Now we use the ‘show master status’ statement to determine the current binary log file name and position. Remember this carefully! In our example we get the following output.
mysql> show master status;
+------------------+----------+--------------+------------------+
| File | Position | Binlog_Do_DB | Binlog_Ignore_DB |
+------------------+----------+--------------+------------------+
| mysql-bin.000153 | 106 | | |
+------------------+----------+--------------+------------------+
1 row in set (0.00 sec)
Step 3) Connect from the slave to the master
To set up the slave to communicate with the master for replication, you must tell the slave the necessary connection information.
First logon on you’re slave with the root user:
mysql -u root -p
and type in the MySQL prompt:
mysql> CHANGE MASTER TO
-> MASTER_HOST='ip-number of master',
-> MASTER_USER='repl',
-> MASTER_PASSWORD='repl',
-> MASTER_LOG_FILE='mysql-bin.000153',
-> MASTER_LOG_POS=106;
And … the last command simple type:
mysql> START SLAVE;
… and you are running MySQL in with Replication! Try to make some changes in the master. For example make a new database and a table and fill it with some rows. Look in the slave and see that the changes are processed.
If there is existing data in the master then create a data dump with the ‘mysqldump’ command on the master. Once the data dump has been completed, you then import this data into the slave before starting the above Replication process.
More information MySQL Replication How To
Deploy Grails Apps in 3 simple steps to Amazon Beanstalk
We can easy deploy the Grails WAR file to Amazon Beanstalk in 3 simple steps:
- We have to create an Amazon Web Services Account (this part is not described is this post)
- We have to make a MySQL database. We use Amazon RDS
- We have to make the Amazon Elastic Beanstalk and deploy the WAR
Important note before you start!
We need security groups, to connect local client tools and Amazon Elastic Beanstalk to the MySQL Database Instance. To succeed to make this connection it is important to install Amazon RDS and Amazon Elastic Beanstalk in the same region. At this moment you can choose only select one region for setting up Amazon Elastic Beanstalk (US East) so your region for Amazon RDS must be ‘US East’.
Make MySQL Database Instance with Amazon RDS
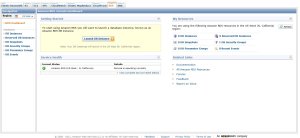
1) Sign in to the AWS Management Console and choose for the RDS tab
2) Press the Launch DB Instance Button
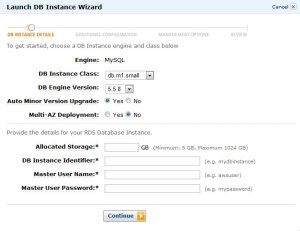
You see the first screen. In our case we fill in the following:
Allocated Storage: 5
DB Instance Identifier: db
Master User Name: root
Master User Password: mysql
The other fields will have the default value
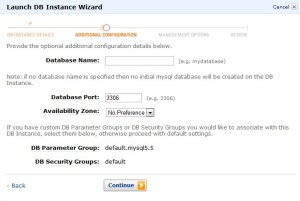
3) In the second screen you can enter some additional configuration
Database name: database
The other fields will have the default value
4) In the other screen you can enter some management options like backup scedule etc.
5) After you review all the info and pressing the Launch button you get an available MySQL Database Instance!
Fill in the DB security group to authorize access from local client tools and elastic beanstalk
Enter in the default security group:
1) a CIDR/IP connection type with IP/32 of the machine with client tools. Fill in your IP, to haven direct access with your own client tools
2) a EC2 Security Group type with Security Group:elasticbeanstalk-default and enter your AWS Account ID
Make the elastic beanstalk and deploy the Grails WAR
1) We use the production evironment option in the datasource.groovy to put in the Amazon information. Use the endpoint of the Amazon RDS / MySQL Database Instance as the machinename and the Amazon Beanstalk environment in the jdbc connection.
production {
        dataSource {
            pooled = true
            driverClassName = "com.mysql.jdbc.Driver"
            dbCreate = "update" // one of 'create', 'create-drop','update'
            username = 'root'
            password = 'mysql'
            url = 'jdbc:mysql://'endpoint':3306/'environment''
            dialect = org.hibernate.dialect.MySQL5InnoDBDialect
            properties {
                validationQuery = "SELECT 1"
                testOnBorrow = true
                testOnReturn = true
                testWhileIdle = true
                timeBetweenEvictionRunsMillis = 1000 * 60 * 30
                numTestsPerEvictionRun = 3
                minEvictableIdleTimeMillis = 1000 * 60 * 30
            }
        }
    }
2) Create the Grails WAR with the correct datasource.groovy file.
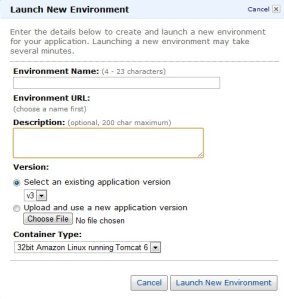
Enter an environment is our case : environment
Upload a Grails WAR file: appname.war
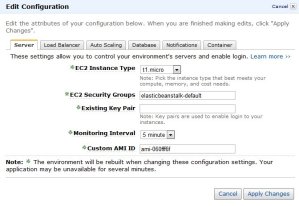
You can edit your environment. See the manual Elastic Beanstalk guide
After successfully upload en deploy of the Grails WAR file you see a little green square!
At this point you have successfully upload and deploy your Grails App to the Amazon Cloud!!!
Look at http://environment.elasticbeanstalk.com/ and enjoy!!!
Deploy Grails Apps in 3 simple steps on Tomcat and MySQL
For a Grails project we use Tomcat for our demo environment on Windows. Our Grails App is using MySQL as datasource. Here are 3 simple steps to get your Grails Apps deployed.
Needed Software
- Java JRE version (We assume you have already Java installed, so that you can skip this step). If not download and install
- WampServer 2.1e (32 bits) of WampServer 2.1d (64 bits) download
- Tomcat version 7.0.6. download
- And of course you need the Grails war file and probably some db scripts for MySQL database
Step 1 Installing WampServer
The WampServer package is delivered whith the latest releases of Apache, MySQL and PHP. Double click on the downloaded file and just follow the instructions. Everything is automatic. Once WampServer is installed, you can run some create- or datascripts to MySQL with the known phpMyAdmin tool. IMPORTANT: If port 80 is already in use, you can change the port in the httpd.conf file. Test if the url http://localhost/ is ok. Or if you change the port for example use http://localhost:99/
Step 2 Installing Tomcat
Installing Tomcat on Windows can be done easily using the Windows installer. Its interface and functionality is similar to other wizard based installers, with only a few items of interest. Installation as a service: Tomcat will be installed as a Windows service no matter what setting is selected. The installer will use the registry or the JAVA_HOME environment variable to determine the base path of a Java JRE. The installer will create shortcuts allowing starting and configuring Tomcat. It is important to note that the Tomcat administration web application can only be used when Tomcat is running. If port 8080 is already in use you can change this during the install or later in the server.xml file in the Tomcat/conf directory. Test if the url http://localhost:8080/ is ok. Or if you change the port for example use http://localhost:8099/
Step 3 Deploy the Grails war file
- Start Tomcat with the url http://localhost:8080/ or another port
- Click on manager webapp and logon
- Choose the file to select the Grails war file and click deploy
- If succes, the application must appear in the list and is started
- check this on http://localhost:8080/<appname>
Congratulations your Grails App is deployed now!
FAQ
Q: Portnumber is already in use?
A: Change in httpd.conf in case of Apache, change in server.xml in case of Tomcat
Q: Get errors during phpMyAdmin because sql file is greater than 2MB?
A: change the value of parameter upload_max_filesize for exapmple to 4MB
Q: Tomcat in log files out of PermSize?
A: On commandline use for example C:\Program Files\Apache Software Foundation\Tomcat 7.0\bin>tomcat7 //US//Tomcat7 –JvmMx 1024 ++JvmOptions=”-XX:MaxPermSize=512m” to set the MaxPermSize to 512m
Goto to the blog of mrhaki to read the artikels in Grails Goodness regarding Grails WAR files in combination with Tomcat
